Tuning Guide
The Viper is probably the best high performance One Design sportsboat, with a lightweight, high performance hull and emphasis on ease, simplicity, value, pure sailing enjoyment, and One Design racing. With many years of construction and tuning development we can offer these proven tuning notes. The Viper was upgraded in 2006 with a carbon mast and other features when Rondar Raceboats took over the construction of the boat. You should find the Viper 640 rig responsive and reliable if you set up to the guides outlined in this document, through the practical wind range of 0-25 Knots.
RAISING THE MAST
There are several ways and you should choose the one that suits you best. BEFORE raising the mast, make sure you have the spinnaker sheets in position around the boat, AFT of the mast and forward of the forestay.
- Position the mast so that the heel is over the mast step and loosely tie the base of the mast so that it cannot go any further forward. Connect the shrouds and make sure that you have the lowers hooked into the mast. Lock the spinnaker halyard at the mast end and tie to the bow or trailer. Whilst one person lifts the mast, the other can secure the process by tensioning the spinnaker halyard.
- Hoist the mast to vertical with all rigging attached. Straight lift and hand to a strong pair of hands standing in the boat who drops the mast into the step and holds in position whilst the shrouds and forestay are secured.
For rig tune and trim recommendations across the wind range, please see the attached RigTune and Trim Tables. Obviously, settings may vary between sailmakers, but please keep the above Viper 640 rig fundamentals and baseline rig tune settings in mind when applying your own and your sailmaker’s recommended adjustments.
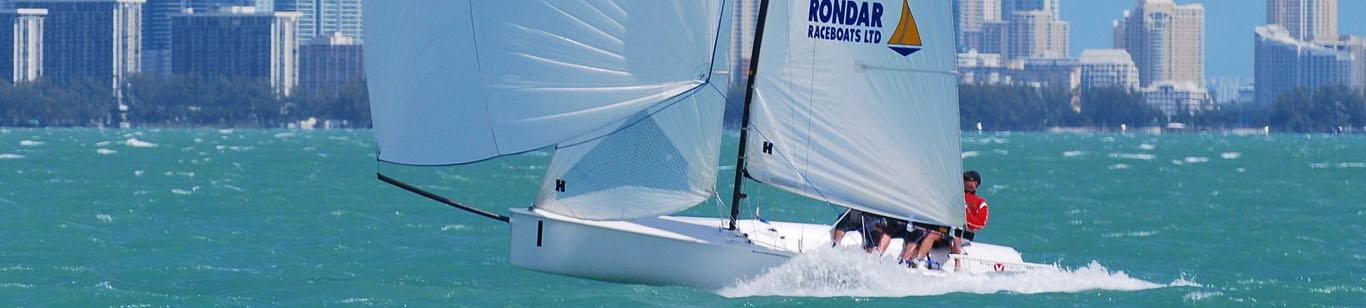
RIGGING THE SPINNAKER
The spinnaker halyard connects to the head, outside the jib sheets.
The line from the centre of the sheet is secured to the tack, outside the forestay and jib sheets.
The downhaul line (the extension of the spinnaker halyard) is connected through the lower spi hole/ tab to the upper tab underneath the jib sheets.
THE KEEL
The boat is supplied with a 6:1 control lines to raise and lower the keel. Remember to raise or tension the line BEFORE any crane lift or trailer launch. Once there is sufficient depth of water, the keel can be carefully lowered and the two bolts secured in place. Reverse the procedure for recovery.
THE RIG
The Viper utilizes a high aspect non-backstay rig with stainless 1 x 19 wire shrouds and headstay, on a round carbon mast.
The critical rig controls are as follows:
– Mast Step Mast Gate (Partners) Headstay (Forestay)
– Upper shrouds Lower shrouds Spreaders/spreader bracket
– GNAV (Vang) Genoa halyard Mainsheet and Bridle Cunningham
Because the Viper rig has no backstay, and carries a reasonably large roach in the main, there are some fundamental considerations that need to be accepted as part of set up and sailing, particularly in conditions over 16 Knots of wind.
These fundamentals are:
-
- The mainsail leech/roach is your downwind backstay.
- The rig requires a minimum of 4.5” (114 mm) of prebend, as the spreader engineering and geometry dictate. This prebend balances the inversion loads exerted on the rig from the asymmetrical spinnaker and to some degree, the mainsail (when trimmed too far out – see below).
- When sailing downwind in breeze above 16 knots, the mainsail must not be eased out to the shrouds. It should be trimmed with the boom no further out than to a point approximately 16” from the shrouds, or with the boom directly over the aft spinnaker sheet turning block. This is not only fast but will keep the mainsail acting as your backstay. Letting the mainsail out beyond this point may produce detrimental flow, and structural conditions that are undesirable. All three sails, when correctly trimmed downwind, produce a slot effect where there is harmonic flow between the sails.
- GNAV pressure is also of primary importance relative to mainsheet/ boom position. This is because the GNAV is the only element that links the mast tip to the boom to the mainsheet, by controlling leech tension. When trimmed correctly (as described above) the leech of the main works in concert with the mainsheet and the GNAV to provide a support structure for the masthead, supporting the tip aft. Essentially, the mainsail leech (roach) should be working to keep the loads pulling aft on the mast tip.
BASELINE RIG SETTINGS
The following are baseline recommended settings for the critical rig controls on the Viper 640 (where appropriate), and discussion of the impact that these settings will have on rig tune and safety. For detailed rig tune adjustments appropriate to each wind range, please refer to the rig tune and trim setting tables at the end of this document.
MAST STEP
Putting the mast in the appropriate location on the mast step, combined with the appropriate headstay length, will yield the correct baseline setting for optimum helm balance. In new Rondar boats, the mast should be positioned against the bolt in the second hole from the rear of the step. The forward bolt should prohibit any forward movement. The aft face of the mast step should measure 146 7/8” (3730 mm) from the turn of the transom at the cockpit floor, measured at the side of the Rudder post.
MAST GATE (Partners):
The mast gate control system (chocks/purchase) controls pre-bend and limits inversion (when the mast is held forward). The forward puller should be rigged to keep the mast with at least 4.5” (114 mm) of pre-bend.
Marginal chocking in front of the mast helps to contain pumping in a seaway, and has some benefit in the overall control of headstay tension when used appropriately in conjunction with the lower shrouds.
HEADSTAY (Forestay):
Baseline setup suggests that for optimum helm balance (assuming the mast step is positioned as described above), the headstay (forestay) length should be 298” (7571 mm) from the bearing point of the “T” tang to the bearing point of the lower pin.
Measurement Tip – An easy method for measuring the headstay:
Detach the headstay from the bow chainplate. Take to the front of the mast, and pulling tension down, mark the bottom of the lower white measurement band on the mast onto the headstay with a fine tip marker or tape. Reattach the Headstay. The measurement from this mark to the center of the headstay pin should be 52” (1320 mm).
(Note: On earlier Bennett built boats (hull numbers under 69), the headstay chainplate is .75” (20 mm) further aft.
The above headstay measurements should be reduced by .3” (8 mm) to compensate.)
UPPER SHROUDS:
These hold the mast in the boat, in conjunction with the forestay. When correctly tensioned they compress the shrouds into the rig, creating pre bend. Minimum pre-bend is 4.5” (114 mm). The Rig Tune Table in this document provide more detailed settings for performance within each wind range.
LOWER SHROUDS:
The lower shrouds are provided as an instrument for containing mast bend, with a benefit that when used correctly, they help to keep the mast “in column” for conditions over 10 Knots. They are a key device for controlling headstay tension as the conditions increase. They limit the amount of compression bend as the upper shroud tension is increased. As with the upper shrouds, refer to the Rig Tune Table at the end of this document for lower shroud settings appropriate to each wind range.
SPREADERS:
These come from the factory pre-drilled with correct geometry. When installing the Upper wires/ spreader tips, install the pin with two holes showing. This should give you an outside swage to outside swage measurement of 48.3” (1227 mm). The correct spreader angle will result in a distance of no less than 12.25” (311 mm) measured from the aft face of the mainsail track to a line connecting the shrouds at the spreaders.
GNAV (Vang):
This is loaded on a boom track (on top of the boom) one end and positioned into a gooseneck at the other end. The 4:1 control line is secured around the mast and leads through the top of the boom to a single block. This is controlled by a further 2:1 control line which is led to each side of the cockpit alongside the helm position.
The GNAV is engineered to push down on the boom and forward on the mast, controlling mainsail leech tension. The Aluminum GNAV tube should be of max length permitted by the class, 50.4” (1280 mm). With a maximum length GNAV, the point of loading is moved aft along the boom, decreasing boom compression loads and gooseneck sheer loads, while maintaining optimum mainsail leech tension. A Harken or Ronstan ball bearing car system further improves efficiency.
JIB HALYARD
The halyard exits the mast, passes through a single block and then to a cleat on the deck. From this there is a fine 4:1 fine tune with a cleat under the deck each side to allow for adjustment whilst racing.
MAINSHEET
a. Boom limits: Critical for downwind mainsail leech control (above 16 knots wind speed). With the mainsail hoisted, ease out the mainsheet until the boom is 16” (406 mm) from the shroud. Mark your mainsheet with a contrasting color (whipping, vivid marker or knot) as a reference for maximum ease. (This point also places the boom directly over the quarter Asymmetric turning block as a reference.)
b. Upwind Mainsail sheeting and Bridle tuning:
The key to efficient upwind trim is to have the ability to sheet the mainsail hard on centerline and simultaneously find the apex of the bridle. The ideal amount of mainsheet tension at the point of maximum trim will vary depending on the wind conditions and crew weight (the mainsail is likely to be trimmed harder in 8 – 13 knots than at any other time). Ideally, you should set up the bridle length so that the mainsheet will “block 2 block” (blocks touching between the bridle and the boom) just at the point of maximum desired mainsheet tension for the conditions. If the mainsheet “blocks 2 blocks” before you are at max trim, you should shorten the bridle. If there is still a gap between the blocks when you are at max mainsheet tension for the conditions, you should lengthen the bridle. In essence, with an adjustable bridle, you will likely lengthen it for lighter air in order to keep the boom on centerline. I advocate using the smallest possible blocks (40 mm) in order to keep the boom as close to centerline as possible for upwind sailing. In addition, be sure to have one or two straps or have your sailmaker fabricate a ½ sock to keep the mainsheet up under the boom, rather than strangle you during a jibe.
c. Aft sheeting vs. fwd sheeting:
This comes down to preference. Forward sheeting allows for a traditional (J 24/ J 22/ Sonar) style of tacking, where the tiller may be rotated aft. The aft bridle requires Laser style tacking procedure where you need to pay more attention to the passage of the tiller extension. The aft bridle offers more leech control as mainsheet loads are carried more directly to the leech.
CUNNINGHAM CONTROL
This 2:1 control line (yellow) leads through the block on the tack of the sail and down to a simple clamcleat.
The cunningham assumes its typical mainsail shaping role in wind speeds to the mid-high teens. It takes on a special role downwind in heavy air, when combined with the vertical luff panels in your mainsail, the cunnigham tension helps produce and maintain prebend in the mast. Therefore, when turning downwind in heavy air, the upwind cunnigham tension can be held on as it will help to produce and maintain prebend.


